 Seattle
 Building a Deck That Actually Holds Up in Renton
Renton sits in a part of King County where a deck earns its keep every single month of the year, not just in July and August. The same driving rain that soaks the Puget Sound lowlands settles into end grain and fastener holes. Marine-tinged air drifting in off the Sound accelerates corrosion on anything less than the right grade of hardware. And the long stretch of gray, damp months between fall and spring gives moss and algae plenty of time to take hold on any surface that doesn't drain and dry properly. A deck built without those realities in mind will look fine the first summer and start showing problems — soft spots, rusted fasteners, slick green boards — within a couple of wet seasons.
This page is about one job in one place: custom deck construction for homeowners in Renton. Not a generic overview of decking options, but what actually matters when the structure has to survive a Pacific Northwest wet season year after year.
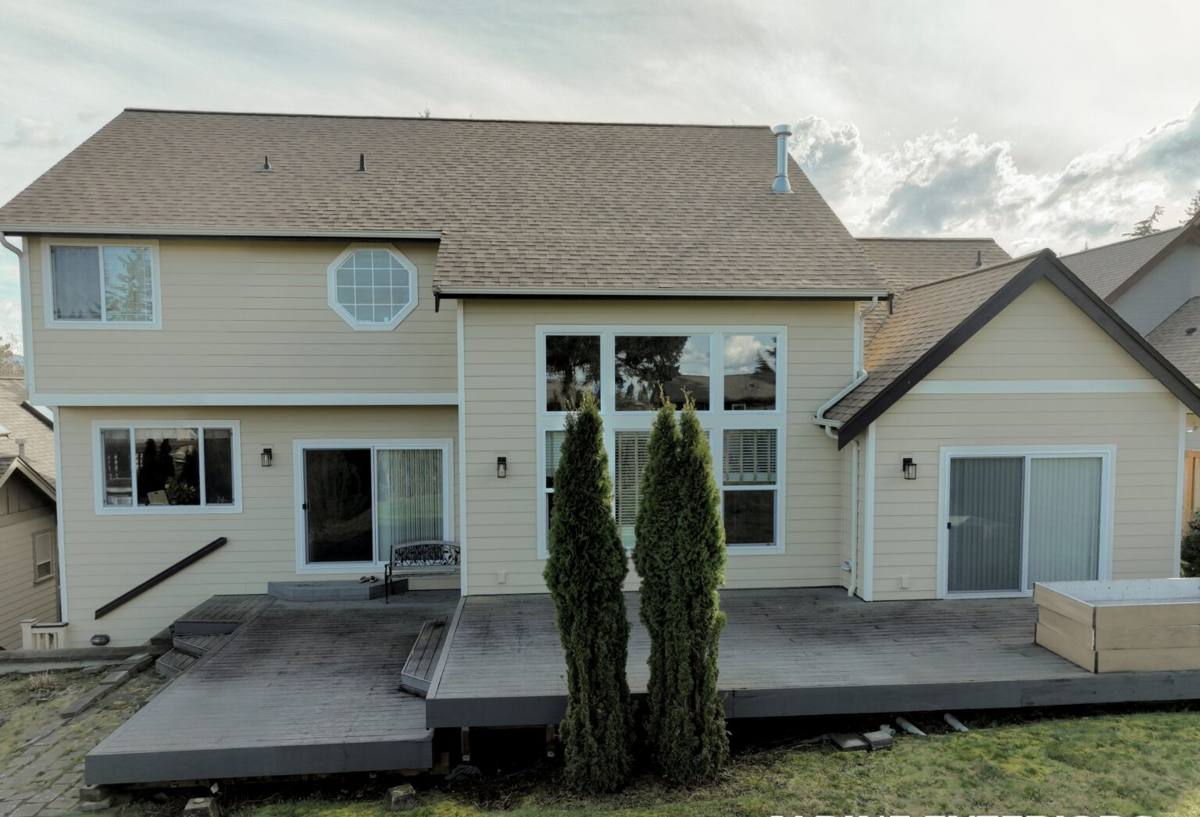
What Renton's Climate Actually Does to a Deck
Three things define the challenge here, and they compound each other.
- Driving rain: Wind-driven rain doesn't just fall straight down — it gets pushed sideways into ledger connections, under railing posts, and into any gap where flashing was skipped or done poorly.
- Salt-tinged marine air: Metal hardware exposed to that air corrodes faster than it would inland. Fasteners, joist hangers, and structural screws all need to be rated for it, not just "exterior grade."
- Long moss season: Shaded decks, north-facing decks, and anything under mature tree cover stay damp for weeks at a time in fall, winter, and early spring. That moisture supports moss and mildew growth on decking surfaces and turns them slick and slippery.
None of these are exotic problems, and none of them require exotic solutions. They require doing the ordinary parts of deck construction — flashing, fastener selection, drainage, spacing — correctly and consistently, instead of cutting corners that don't show up until year two or three.
The Ledger Connection: Where Most Deck Failures Start
If a deck is attached to the house, the ledger board connection is the single most important detail on the entire project. It's also the most common place we find problems on decks we're asked to repair or replace. A ledger that isn't properly flashed lets water track behind the siding and into the rim joist and framing below — damage that's invisible from a walk-around inspection until the wood is already soft.
What correct ledger installation involves
- Removing siding at the attachment point rather than fastening through it
- Continuous flashing that directs water out and away from the house, lapped correctly with the house's weather-resistive barrier
- Proper structural fasteners or through-bolts rated for the load, not just deck screws
- A small gap between the ledger and the siding above to let any incidental moisture drain and the wall assembly breathe
On a freestanding deck — one supported entirely by its own posts and footings rather than attached to the house — this isn't a factor, which is worth considering during design if the site allows it.
Footings, Framing, and Drainage
Below the decking boards, the framing and footings do the actual work of holding the structure up through wet winters and whatever load gets put on it. In this region that means footings set below frost depth and sized for the soil conditions on the lot, since King County soils vary from well-draining glacial till to heavier clay that holds water longer.
Framing lumber should be rated for ground contact where it's close to grade, and joists benefit from a coat of end-grain sealer at every cut — end grain is where lumber absorbs water fastest, and it's usually the first place rot starts. Joist hangers and structural connectors need to be hot-dip galvanized or stainless, matched to whatever fastener is going into them, since mixing metals accelerates corrosion in damp conditions.
Drainage under the deck
A deck that sits low to the ground with poor airflow underneath stays damp longer after every rain, which feeds both wood rot and moss growth on the decking above. Grading the ground under the deck to shed water away from the house, keeping vegetation from crowding the underside, and leaving adequate clearance between the framing and the soil all help the structure dry out between storms instead of staying wet for days.
Choosing a Decking Material for This Climate
There's no single "correct" decking material — the right choice depends on budget, how much upkeep the homeowner wants to do, and how much sun or shade the deck gets. What matters is going in with clear eyes about the trade-offs, since the local climate exposes weaknesses in any product that's installed carelessly or maintained inconsistently.
| Material | Moisture Behavior | Maintenance | Typical Lifespan |
|---|---|---|---|
| Pressure-treated wood | Absorbs and releases moisture; prone to cupping/splitting if not sealed | Annual cleaning and re-staining or sealing | 15-20 years with upkeep |
| Cedar | Naturally rot-resistant but still needs sealing in wet climates | Regular sealing; graying without maintenance | 15-20 years with upkeep |
| Composite | Doesn't absorb water like wood; can still support surface mildew if not cleaned | Periodic washing; no staining or sealing | 25-30 years |
| PVC/capped polymer | Fully water-resistant surface | Occasional washing | 25+ years |
Whatever material a homeowner chooses, board spacing matters as much as the product itself. Boards installed too tight, without a small gap for water to shed through, hold moisture on the surface longer — which is exactly what feeds moss growth during our long wet stretches. We set spacing based on the specific product's expansion characteristics, not a one-size-fits-all gap.
Fasteners and Hardware: The Detail That Gets Skipped
This is where corner-cutting shows up fastest in a marine-influenced climate. Standard coated deck screws can start showing surface corrosion within a couple of seasons in this area, especially on decks closer to open water or exposed to prevailing wind. We use stainless steel or heavy hot-dip galvanized fasteners and connectors sized for the specific decking and framing material, and we avoid mixing incompatible metals that accelerate galvanic corrosion when they're in contact and wet.
It's a detail that costs a little more upfront and is completely invisible once the deck is finished — which is exactly why it's an easy thing for a corner-cutting crew to downgrade without the homeowner ever knowing, until fasteners start bleeding rust streaks down the decking a few years in.
Railings, Stairs, and Slip Resistance
Railings and stairs see the most direct wear on a deck and also the most consequence if something fails. Post attachment needs to tie into structural framing, not just the decking boards or rim joist skin. In a climate with a long moss season, stair treads and any shaded walking surface deserve extra attention to material choice and texture — a smooth, damp board on a step is a real fall hazard, and it's one of the most common complaints we hear about decks built without that in mind.
Design details worth discussing before construction
- Stair tread material with better wet-traction than the main deck surface
- Railing height and baluster spacing that meet current code, especially on any rebuild of an older deck
- Post-to-structure attachment engineered for real lateral load, not just screwed to fascia boards
- Orientation and any roof or shade structure that affects how much sun hits the deck and how fast it dries after rain
Cost Factors on a Custom Deck Project
Every custom deck is priced around the specifics of the site and the homeowner's choices, so we don't quote flat rates on a page like this — but it helps to understand what actually drives the number up or down.
| Factor | Why It Affects Cost |
|---|---|
| Height above grade | Taller decks need more substantial framing, footings, and often stairs and additional railing |
| Decking material | Composite and PVC cost more upfront than wood but reduce ongoing maintenance |
| Attached vs. freestanding | Ledger connections require careful flashing work; freestanding decks need more footings instead |
| Site access and grading | Sloped or hard-to-reach lots increase excavation and footing labor |
| Railing and stair complexity | Custom railing designs and multi-level stairs add material and labor time |
| Permit and inspection requirements | Larger or higher decks typically require more inspection steps, adding to the timeline and cost |
Permits and Local Requirements
Most decks above a certain height or attached to the structure of a home require a building permit locally, and King County jurisdictions generally require inspections at key stages — footings, framing, and final. Skipping this step isn't a shortcut worth taking: an unpermitted deck can complicate a home sale down the road and, more importantly, skips the inspection checkpoints that catch framing or flashing mistakes before they're buried under decking boards. We handle the permit process as part of the project rather than leaving it for the homeowner to navigate.
Our Process for a Renton Deck Project
- Site visit and assessment — we look at grade, sun/shade exposure, drainage, and how the deck will attach (or not) to the house.
- Design and material selection — sized and laid out for how the homeowner actually plans to use the space, with material trade-offs explained honestly.
- Permitting — drawings and applications handled on the homeowner's behalf where required.
- Framing and flashing — footings, ledger work, and structural connections done to code, not just "to pass."
- Decking, railing, and stairs — installed with attention to spacing, fastener choice, and slip resistance.
- Final walkthrough — we go over the finished deck and basic maintenance with the homeowner before calling the job done.
Keeping a New Deck Looking Right Through the Wet Season
A well-built deck still needs some seasonal attention in a climate like this. A short annual routine keeps moss from getting a foothold and catches small issues before they become expensive ones.
- Sweep off leaves and debris regularly in fall — trapped organic matter holds moisture and feeds moss growth
- Rinse the surface periodically through the wet months, especially in shaded areas
- Check railing posts and stair connections yearly for movement or loosening
- Re-seal wood decking on the manufacturer's recommended schedule, not just when it visibly looks dry
- Keep gutters and downspouts near the deck clear so runoff isn't dumping extra water onto or under the structure
- Look underneath once a year for standing water, sagging joists, or signs of pests
Why a Crew That Already Works in Renton Matters
A deck design that works fine in a drier climate can fail here simply because it wasn't built with our rain patterns, marine air, and moss season in mind. A crew that regularly builds and repairs decks in Renton and the surrounding King County area already knows which details matter most on a given lot — how much sun a specific orientation actually gets through the winter, what soil conditions to expect, and which fastener and flashing choices hold up rather than needing attention again in a few years. That local experience shows up in the parts of the deck nobody sees until something goes wrong: the flashing behind the ledger, the hardware inside the joists, the drainage under the frame.
If you're planning a new deck or replacing one that's showing its age, we're happy to walk the site with you and talk through what makes sense for your home. There's no pressure and no cost to get a straightforward estimate — just a look at the space and a plan built around how it actually needs to perform here.